Podaegi Tutorial
This tutorial is not for a beginning sewer. The project itself is not difficult, but I do a very poor job of remembering to explain steps that seem second nature to me (like seam allowances, etc).
Stitching a baby carrier: Precious cargo! I use high quality thread (usually Gutterman) and a very short stitch length. I use Xboxes where two pieces are sewn together at a stress point, and I always top stitch. It not only makes a neat finished look, it also adds strength. All hardware (rings, buckles, etc) should be individually tested and purchased from a reputable manufacturer.
Total Time to Completion: 2.5 hours
The basic pattern I followed is outlined here. I chose to make my blanket 20 by 27 inches. I like the longer "skirt" at the bottom. I wanted a reversible carrier, and chose these two fabrics. I doubt the flower side will see much use - Eamon points to the guitars and says, "Tars!"

Cut from blanket fabric: 2 pieces, 21"x30" (1 each of reversing fabrics). With pieces this large, I usually make a rough scissor cut of approximate size, then clean it up with the rotary cutter.
Pin pieces together right sides together. I made a curve at the bottom of my blanket, just because it's pretty. If curve is desired, draw that now. Trim 1/2" away from drawn line.

Set blanket aside for now. Cut strap fabric seven inches wide by 180" long (ideally, you would have one long piece of strap. For whatever reason - probably financial - I didn't get 5 yards of my strap fabric, so I had to sew two pieces together). Whenever I sew pieces together on a carrier, I triple sew the seam. In this case, I sewed the wrong sides twice, then pressed the allowance and sewed that down. Fold your strap right sides together, then find the middle and mark it. Lay it on your workspace. Fold your blanket in half, mark the middle, and line it up with the middle of the straps. With a washable pencil or marker, make a mark on each half of the straps to show where the blanket will fit into the strap. You will sew your straps together from each end to this point, leaving the middle open to slide the blanket in.
 I added a taper to the end of my straps. No particular reason, just because I like the finished look. Make 'em straight if you want.
 Once the strap ends are sewn, turn and press. After pressing, I bundle mine as shown below. This makes it much easier to wrangle the bulk while you are sewing the blanket in place. Also press the middle area of the straps, turning the raw edges under.
 Measure your padding (I used a double layer of quilt batting) to fit the area where your strap is not sewn yet. Mine is about 2" wider on each side than the blanket. If you want padded straps, it would probably be best to sew in the padding when you sew the strap. For what it's worth, I wish I had made padded straps.
 I'm going to make some strap wraps to give myself extra padding over my shoulders, so that when I wear it ruck style it's not digging into my bones. How I actually fixed my straps: cut off the ends, sewed a "tube" of batting, stuffed it into the strap, sewed it down with quilting lines, reseamed ends of straps.
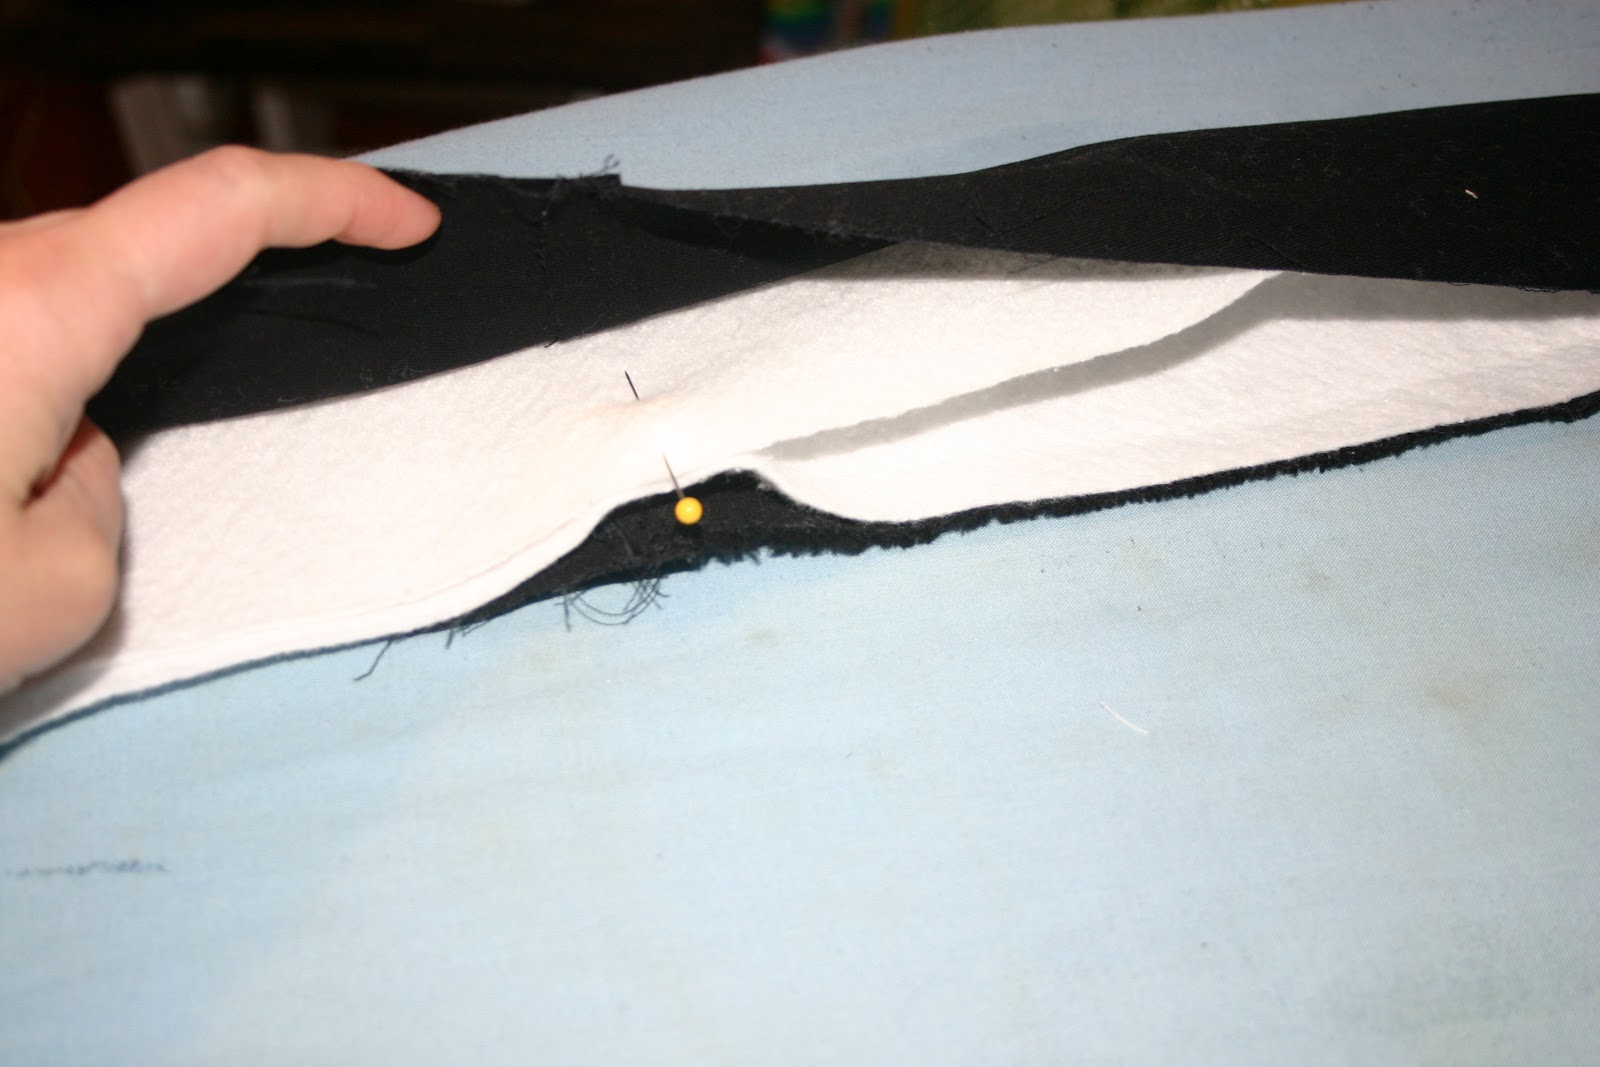
 Insert the padding into the strap, and tuck it behind the raw edge of the strap fabric. The easiest way I found to do this is to mark the middle of the padding, match it up to the middle of the strap, and start tucking.


Insert the blanket into the strap, pin well, and sew.
 I (with Eamon's help) marked every inch as a sewing line. I like the quilted look, and having that many lines of sewing makes me feel good about how secure the carrier is.

 Eamon says, "It's 'tars!" And then proceeded to ask me put him on my back. It's amazing how he knows that anything with straps is probably used to carry him around.


Stitching a baby carrier: Precious cargo! I use high quality thread (usually Gutterman) and a very short stitch length. I use Xboxes where two pieces are sewn together at a stress point, and I always top stitch. It not only makes a neat finished look, it also adds strength. All hardware (rings, buckles, etc) should be individually tested and purchased from a reputable manufacturer.
Total Time to Completion: 2.5 hours
The basic pattern I followed is outlined here. I chose to make my blanket 20 by 27 inches. I like the longer "skirt" at the bottom. I wanted a reversible carrier, and chose these two fabrics. I doubt the flower side will see much use - Eamon points to the guitars and says, "Tars!"

Cut from blanket fabric: 2 pieces, 21"x30" (1 each of reversing fabrics). With pieces this large, I usually make a rough scissor cut of approximate size, then clean it up with the rotary cutter.
Pin pieces together right sides together. I made a curve at the bottom of my blanket, just because it's pretty. If curve is desired, draw that now. Trim 1/2" away from drawn line.


Sew pieces together along the
long sides and bottom.
Turn, press, and top stitch.

Set blanket aside for now. Cut strap fabric seven inches wide by 180" long (ideally, you would have one long piece of strap. For whatever reason - probably financial - I didn't get 5 yards of my strap fabric, so I had to sew two pieces together). Whenever I sew pieces together on a carrier, I triple sew the seam. In this case, I sewed the wrong sides twice, then pressed the allowance and sewed that down. Fold your strap right sides together, then find the middle and mark it. Lay it on your workspace. Fold your blanket in half, mark the middle, and line it up with the middle of the straps. With a washable pencil or marker, make a mark on each half of the straps to show where the blanket will fit into the strap. You will sew your straps together from each end to this point, leaving the middle open to slide the blanket in.


Insert the blanket into the strap, pin well, and sew.


Comments
Post a Comment